Introduction
Aim: You will learn to judge whether the glider is under or over shooting the Reference Point, and how to manage the steepness of the Approach Path.
What do we know?
- What is a Reference Point?
- How do we choose it?
- Why do we use it?
- How do we control speed?
- How do we control descent?
- When does the Approach Path start?
- When does the Descent Path start?
RP Recap
- Choose a Reference Area when at Low Key
- Finalise the Reference Point early in the Approach
- RP is then ‘fixed’
Controlling the Approach
Use judgement to decide when you have reached the Descent Path. What’s happening here?
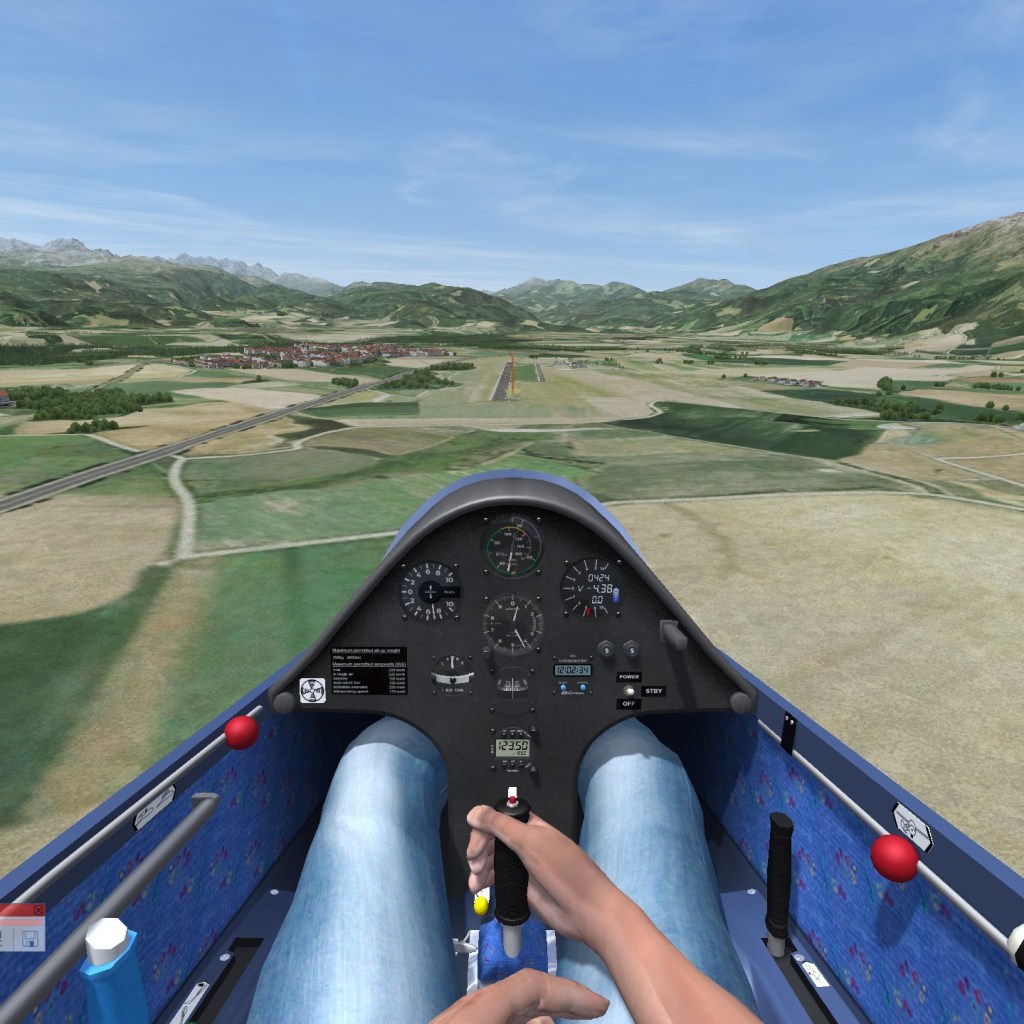
When on the Descent Path, the RP should be held fixed in the canopy.
- This sequence shows a glider On Descent Path, Speed constant, Airbrake setting constant, RP fixed:
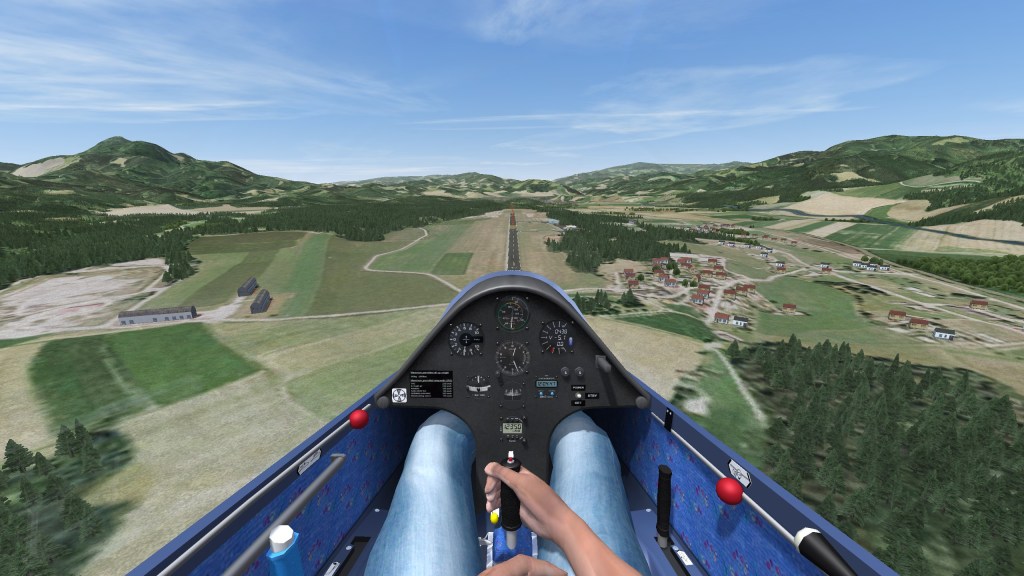

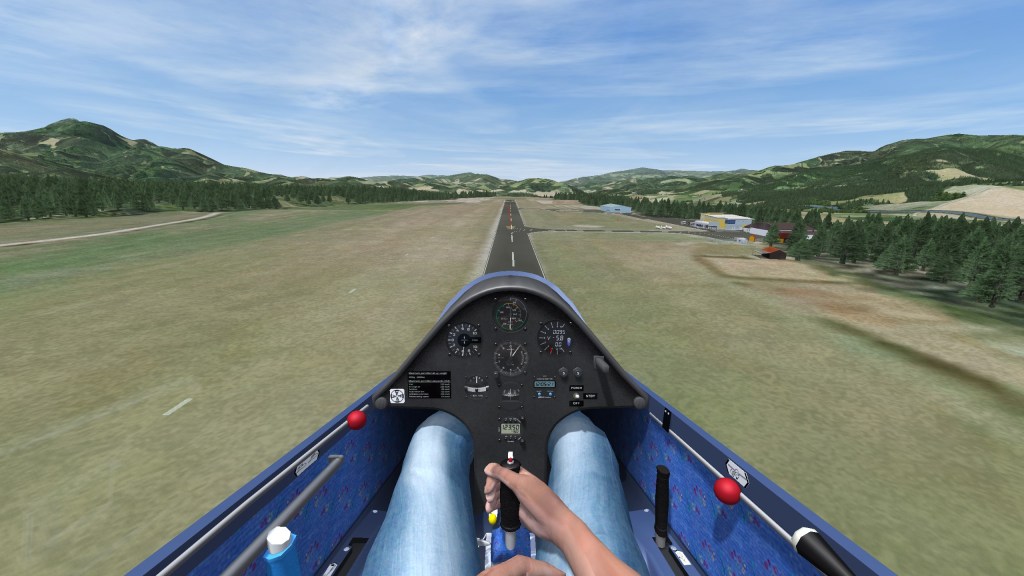
- RP moving Up the canopy indicates Undershoot
- RP moving Down the canopy indicates Overshoot
A steady Speed (and Attitude) is important. Why?
- Allows judgement of the Over and Under shoot by reference to the RP’s movement in the canopy. This is not possible if the attitude is changing.
The prior choice of Approach Speed should cater for wind speed, wind gradient and slope, to avoid stalling and to manage the ground speed.
Control the Speed with Elevator by reference to
- Attitude
- ASI
Control the Descent Path with Airbrakes by reference to
- RP movement up / down
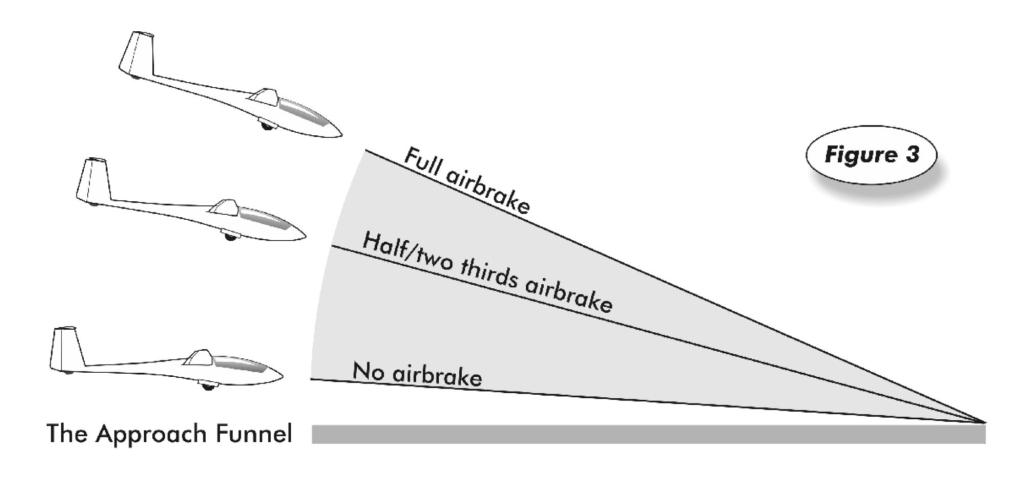
How much Airbrake?
Airbrake’s effect on glide slope:
The effect of a headwind:
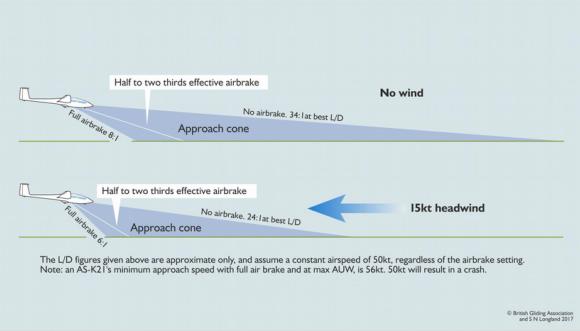
Ideally use half to two thirds
- Effect, not Amount
Why so much?
- Options!
Impact of a wind gradient:
- Reduce the amount of airbrake to maintain a safe speed:

Beware the shallowing approach!
When does the Approach end?
- Commence the round-out at approximately treetop height
- Abandon the RP at this point, to focus ahead (horizon)
Flaps
- Effects vary between gliders
- Read the Flight Manual
Recap
An example Approach with overshoot (video)
- How and when do we choose the RP?
- How do we judge under / over shoot?
- How do we correct any under / over shoot?
- What speed do we maintain?
TEM
Threats
It is a stressful situation
Mitigation:
- Take time to develop your judgement.
- Start the circuit at a safe height, and modify it as needed.
Collision
Mitigation:
- Maintain thorough lookout during all phases of the circuit and approach.
Weather
- Low Sun
- Misting Canopy
- Cross-wind
- Head-wind
- Wind Gradient
Mitigation:
- Plan the circuit, landing direction and approach speed appropriately.
- Land before the canopy mists. Use the DV panel if required.
Glider characteristics
- Long, low wings
- Contamination (rain, bugs)
Mitigation:
- Know your glider and gain experience is the easiest conditions possible.
Errors
Shallowing approach due to the incorrect technique during an undershoot scenario.
Mitigation:
- Ensure the correct technique is used.
Instructor failing to take control in time.
Mitigation:
- When the student pilot males an error at a critical stage of the flight, the instructor MUST take control.
Collision with the ground, rounding out too late.
Mitigation:
- Look well ahead just before the round-out.
Stall / Spin.
Mitigation:
- String Straight, Speed Control.
Flight exercises
Approach control should be taught separately from circuits and landings. The lesson on Effects of Airbrakes is a pre-requisite; the student pilot should be competent in their operation.
This lessons teaches:
- Descent path is controlled by airbrakes;
- Approach speed is controlled by elevator.
Demonstration of a Normal Approach
- Final Turn, c. 200′ higher than normal, roll out aligned with the final approach.
- Maintain attitude and airspeed.
- When intercepting two-thirds airbrake approach path, highlight:
- Aligned with approach path, maintaining approach speed (xx kts),
- Open two-thirds airbrake – glance at them,
- Note the position of the RP in the canopy, it remains fixed.
- Alignment – attitude – airspeed – RP.
Demonstration of an Overshoot
- Establish a normal approach path.
- Close airbrakes to establish a clear overshoot.
- Student notes RP going down the canopy. Instructor confirms this is an overshoot.
- Recover to normal approach: open airbrakes fully, then, when on it, return to two-thirds airbrake.
- Highlight alignment – attitude – airspeed – RP
- If you do not intercept the two-third airbrake approach path again, accept you will land long: maintain the previously stated approach speed.
Demonstration of an Undershoot
- Exit the final turn, align with approach path, with correct speed.
- Before reaching the normal approach path:
- Open the airbrakes early to establish a clear undershoot.
- Student notes RP going up the canopy. Instructor confirms this is an undershoot.
- Recover to normal approach: close the airbrakes, then, when on it, open two-thirds airbrake.
- Highlight alignment – attitude – airspeed – RP
- To avoid landing too short, set the RP well into the field.
Student attempts
- Instructor fly the glider and align it on the final approach, at about the same height & distance as the demonstrations.
- Focus initially on alignment – attitude – airspeed, rather than to an accurate RP.
- Alignment is prioritised over approach path initially.
- Instructor take (and retain) control early if student is not managing.
Remedial exercises for poor speed control: The Overshoot
To show the importance of accurate speed control to the RP
- Select an RP close to the downwind boundary, Final Turn slightly higher and further back than normal.
- Open airbrakes in normal place, but only one quarter.
- Maintain position of the RP in the canopy by lowering the nose… the picture looks right, but we are failing to monitor / control the airspeed.
- When 15-20kts too fast, ‘notice’ the airspeed, correct the attitude and open airbrakes. You will overshoot and land long.
Remedial exercises for poor speed control: The Undershoot
To show the importance of accurate speed control to the RP
- Select an RP well into the field, with a safe undershoot area.
- Approach 5kts too fast.
- Open airbrakes in normal place, fully, to undershoot.
- Maintain position of the RP in the canopy by raising the nose… the picture looks right, but we are failing to monitor / control the airspeed. Be cautious not to loose too much speed for the purpose of the exercise!
- When max 10kts lost, ‘notice’ the airspeed is too low, lower the nose to increase speed, and if safe and above 200′, leave the airbrakes fully open, deliberately landing short.
- If the glider gets too low and slow, close the airbrakes and recover.
