Including the Scan Cycle and Drift
Introduction
Aim: You will understand how to look out for other aircraft, whilst maintaining your attitude, monitoring your instruments & keeping the glider going where you want.
What do we know?
- What are your experiences of flying straight?
- How well were you able to spot other gliders, maintain the speed and keep going where you wanted?
- What made it difficult?
Lookout & The Scan Cycle
What is it?
A workload management system…
“The method used to balance looking out with monitoring the glider’s attitude and checking the instruments.”
90% ‘Head Out of the Cockpit’
Lookout
Why do we need to do it?
- We don’t fly in lanes
- Objects don’t get big until they’re too close
- Our eyes are not adapted to these dangers:
- Small arc of detailed vision
- Our brains fill in the gaps
- Most of our retina detects movement, not detail
- The thing that will hit us is not moving across our field of view, and it grows slowly.
Attention test video
Who does it? Everyone
When? 90% of the time, at least!
How do we fit it in with checking the instruments? The Scan Cycle.
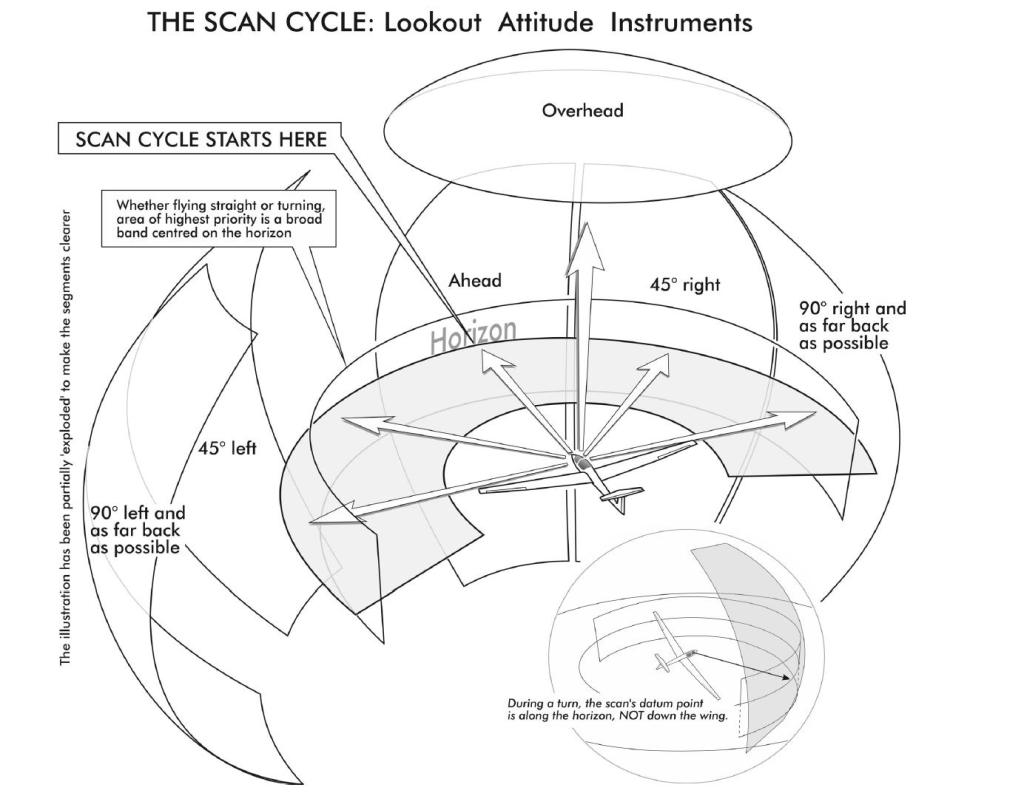
The Scan Cycle Method
LAI: Lookout – Attitude – Instruments
- Lookout:
- Look ahead, focus on, above & below the horizon
- Repeat at 45 degrees, 90 degrees, & all the way back to one side
- Return to Ahead via Above, like upside-down pair of spectacles
- Look over the nose, check and correct Attitude
- Wings level, String central, Picture stable
- Check the Trim
- Glance at Instruments:
- Vario: is the glider in rising or sinking air
- Altimeter: do you have enough height to stay on the same course, or should you return to the airfield?
- Repeat to the other side, completing the upside-down spectacles
Diagram of the Scan Cycle
The method is flexible: Focus on areas of greatest risk for the current phase of flight:
- Anywhere
- Circuit
- Thermal
- Ridge
Rules of the Air
It is everyone’s responsibility to avoid a collision.
| Situation | Rule |
|---|---|
| Give Way: | Balloons have right of way. The primary rule is to avoid collisions with anything. |
| Converging: | On the right is in the right. |
| Head On: | Turn right. Ridge rules vary from this. The glider with the ridge on its right is in the right. The glider with the ridge on its left should turn out from the ridge to give way. |
| Overtaking: | Pass on either side (UK only). On ridges, pass on the ridge side (to allow the other glider to turn away from the ridge). |
| Landing: | The lower glider has priority (but may not cut in front of a glider on Final Approach). An aircraft making an emergency landing has priority. |
FLARM and other Conspicuity devices
- Benefits as an aid to Lookout
- Limitations as an aid to Lookout
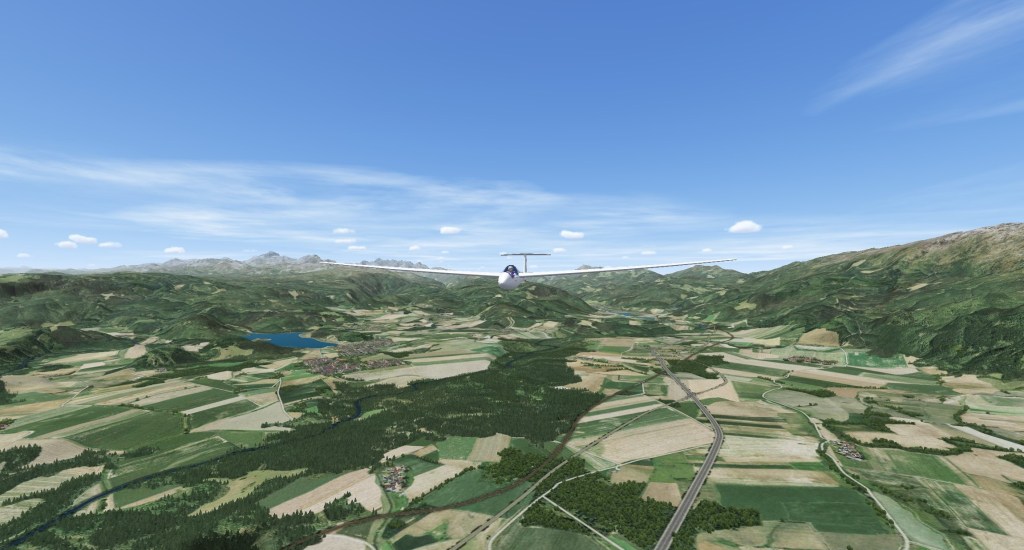
Flying Straight
Why fly straight?
- Getting from A to B efficiently (minimum height loss)
- Approach to the landing area
- Landing on a runway
- Spot landing
- Prerequisite skill for Winch Launch or Aerotow
- To feel for thermals
How do we know we are flying straight?
- Wings level
- String central
- Target is fixed in the canopy – Picture not changing
How do we return to straight flight?
- Aim for a ground feature, or cloud: your Target
- Correct the Attitude with gentle, coordinated aileron and rudder if
- Wings are not level
- String is not central
- Adjust pitch attitude with elevator
- …which is fine so long as there’s no drift.
Video
Of a demo flying straight in still air:
- It starts by showing the glider is stable with no control inputs.
- Mute the video if you do not want the commentary.
Flying Straight in a Crosswind
A Headwind or Tailwind may be fully in line with your direction of travel, and whilst affecting your groundspeed, it would not affect your Track over the ground.
A Crosswind is one which is not in line with your direction of travel. It pushes the glider away from its Target, causing Drift. To track directly towards your target, you must Crab by flying on a Heading slightly upwind of your target.
To Crab in a straight line:
- Fly on a Heading upwind of your Target, by estimating the drift.
- Keep the Target fixed in the canopy (off centre, on the downwind side).
- Adjust the crab angle to prevent the Target moving side to side.
Illustration

1 to 2: There is no crosswind. No correction for drift required.
3 to 4: Crosswind from the right. Heading correction results in a straight track to the target.
5 to 6: Crosswind from the right. Glider keeps heading at the target, resulting in a longer curved track.
The Scan Cycle remains the same
- Lookout
- Attitude (including Track) – correct as needed, using gentle coordinated controls:
- String straight
- Wings level
- Picture not changing
- Instruments
Video
Demonstration of the difference between heading and track in a crosswind. Mute it to miss the commentary. The use of the runway is purely illustrative.
Recap
- How do we perform a scan cycle?
- How do we stay on track whilst looking out?
- What is a crab and why would we use one?
- Who has right of way when gliders are converging?
TEM
Threats
Collision
Mitigation:
- Scan Cycle: Lookout frequently (head out of the cockpit, fly by attitude).
Student Pilot mishandling at high speed
Mitigation:
- Progressive approach to high speed flying.
Errors
Running out of height for an appropriate circuit.
Mitigation:
- Monitor height and position.
Flight Exercises
The early Straight Flying exercises are best taught in calm conditions.
Although these lessons include references to lookout and the scan cycle, the BGA Instructors Manual v5 suggests that lookout (and scan cycle) is taught earlier in the syllabus. It should be re-emphasised in the following exercises.
Lookout & Maintaining Straight Flight (to a basic competency)
- Remind the student pilot to lookout using the scan cycle throughout their flying.
- Settle the glider into trimmed flight.
- Student pilot to follow though, instructor demonstrates coordinated control movements to achieve straight flight on a heading (to a target).
- Student attempts, instructor prompting corrections.
Control of Pitch & Use of Trim
- Student pilot initially operates the trimmer on the ground.
- Demonstrate that speed is related to attitude:
- Student follows through: Fly at a steady attitude: speed is steady.
- Repeat for various attitudes.
- Explain that trimmer takes the load off the stick.
- “Fly by attitude”, not by chasing the ASI.
- Student attempts: hold various attitudes and observe that speed settles.
- Use of Trim
- Student holds an attitude, instructor alters pitch.
- Student notes stick force (fore / aft), then trims.
- Repeat for different attitudes.
Airspeed Monitoring and Control
- Student flies in the normal attitude, tells instructor the ASI reading.
- Ask student to (lower nose to) increase speed by e.g. 10kts to fly at e.g. 60kts.
- When settled, ask student to tell you the ASI reading.
- If not as requested, ask them to adjust the attitude, wait, check, adjust.
- Demonstrate chasing the ASI if required.
Lateral Level, Direction Balance and Trim
Fly this exercise up or down wind.
- Trim and fly towards an obvious landmark, pointing out straight flight due to wings level.
- Demonstrate a slight angle of bank, resulting in a turn away from the landmark.
- Demonstrate correction back to the landmark.
- Student attempts:
- If the air is too still, and the student does not deviate from wings level, apply a little bank: Student corrects.
Correcting for Drift (Heading vs Track)
Perform this exercise on a reasonably windy day.
- Fly directly into wind, towards an obvious landmark. Point out that track is the same as heading.
- Then fly across the wind, with the nose aiming for a landmark. Note the drift.
- Adjust heading for drift, to demonstrate the correction. Note that drift is corrected when the aiming point remains fixed in the canopy.
- Student attempts.
Inherent Longitudinal Stability
Purpose: to show the glider is stable in trim, especially useful for students who do not fly in trim.
- Demonstrate pitch stability – trimmed, both pilots hands-off, speed and attitude steady, glider continues…
- Further:
- Trim and stable at best L/D, or 50kts…
- Lower the nose to achieve plus 10kts (without re-trimming).
- Release the stick: observe glider corrects pitch, re-settling at the trimmed speed, perhaps after a few oscillations.
- Punchline: “Always fly in trim.”
Flight at Critically High Airspeeds
Preparation for spin recovery (etc), avoiding over-control at high speed.
- Student follows through. Demonstrate flight at normal speed, accelerating and decelerating, up to Va, noting sensitivity to the elevator and modest movements of the stick.
- Students attempts, holding for 10-15 seconds, then gently return to normal attitude.
- When proficient, repeat up to midway between Va and Vne.
- Punchline: “Don’t over-control, particularly at high speed.”
