Introduction
Aim: You will know how to execute a safe launch, in terms of handling the glider in a normal launch, and how to anticipate and manage deviations.
What do we already know?
- How do we keep a winch launch safe?
- Where is your left hand during a launch?
- What is a safe speed?
- What is safe climb angle?
What are the risks involved?
- Wing drop:
- Cartwheel
- Ground Loop
- Stall / Spin
- Overspeed
- Managing a Launch Failure
All at a time when you may not be “recent”, “current” or even “familiar”, and you are close to the ground, at speed.
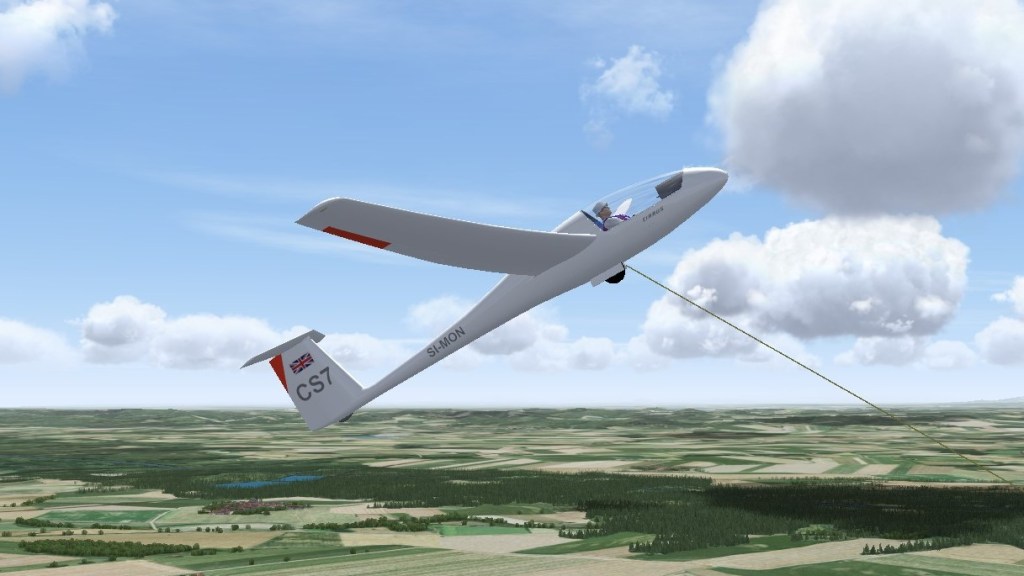
The Launch Profile
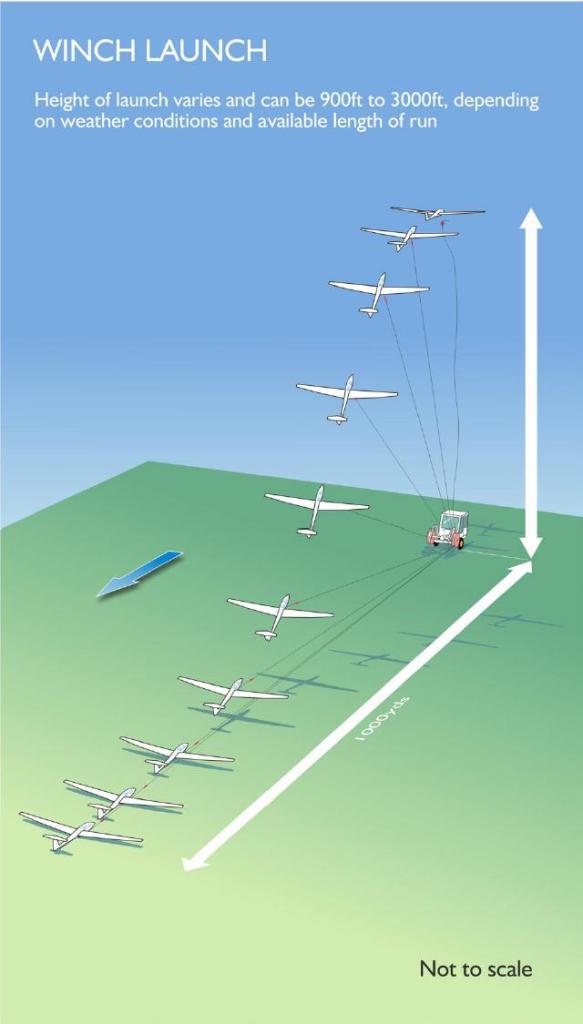
Stages of a winch launch:
- Pre-launch
- Ground Run
- Take-off
- Rotation
- Initial Climb
- Full Climb and Release
Video of a normal winch launch.
Pre-launch
Before getting in the glider
- Is the glider likely to swing?
- Offset Hook
- Heavy Cable bowed to one side
- Glider lined up with the winch (adjusted for a heavy cable as required)
- Cushion usage:
- Seat: Energy Absorbing, e.g. Confor
- Backrest: Firm
- Pre-flight Checks: ABCDE
- All clear ahead?
- Rain etc, on wings or imminent?
- Assess the Wind
In the glider
- Pre-flight Checks: CBSIFTBEC.
- Especially noteworthy for a winch launch:
- Straps must prevent slippage. You need to access:
- Rudder pedals, full stick movement, panel & switches
- Straps must prevent slippage. You need to access:
- Especially noteworthy for a winch launch:
- Min and Max safe winch launch speeds
- Wind:
- Direction (see Crosswind, below)
- Strength & Turbulence effects on airspeed
- Gradient (impact on rate of rotation, allow for descent through it post-failure)
- Cloud base
- Avoid penetration – monitor proximity during the climb
- If entered:
- release cable under tension, assume normal attitude (while monitoring speed), airbrake to descend.
- look downwards: the ground may still be partly visible.
- Where to go first (assuming a safe launch)?
- Weak link colour
- Is the correct hook being used?
- Keep hold of the Cable Release until the launch is completed
- Is the glider likely to swing?
- Offset Hook
- Cable laid to one side
- Wind
- Can you still see clearly ahead?
Taking the launch
- Who is responsible for taking the launch?
- Signalling readiness to launch
- Preventing a launch
Ground Run
- Balance on the main wheel (Elevator)
- Wings level (Ailerons)
- Maintain direction (Rudder), with string straight when speed is sufficient
- Separate use of aileron and rudder on the ground
- Big control inputs initially
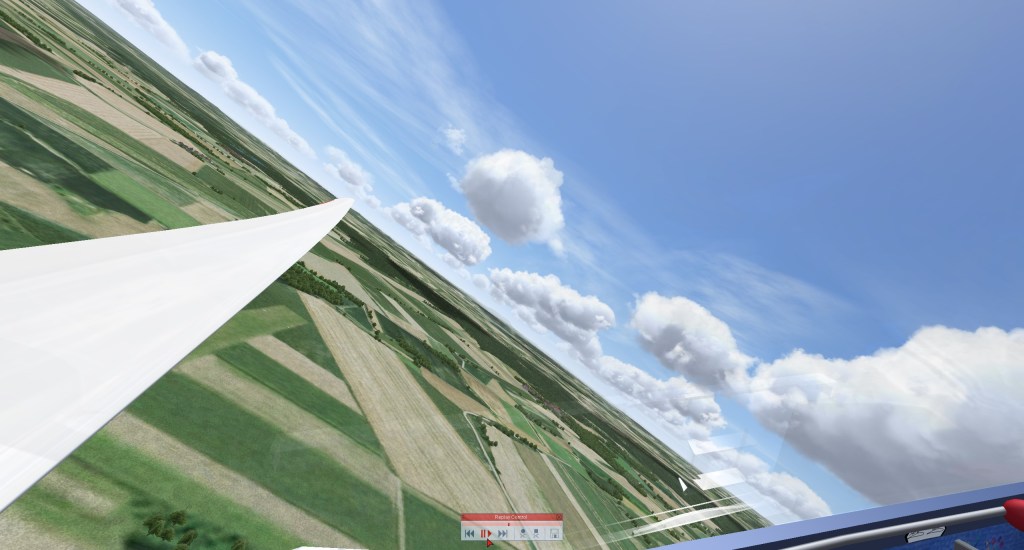
Wing Drop
If you cannot keep the wings level…
You must release!
Recognising that the wings are not level…
- The emphasis is on keeping the wings level.
- You must learn to recognise when a slight deviation is becoming uncontrollable.
- A wing tip on the ground has passed the safe limits. You can visualise this beforehand by noting the view ahead with the tip on the ground, with the glider held in the ground-run attitude:
Video of a wing drop
Video: A real-life example of a wing drop
Video: Pure Glide’s confession, and analysis of a similar incident Viewer discretion advised as the video starts with another accident resulting in a crash.
- What would you do?
- When?
Take-off
- Allow the glider to lift off by itself, usually stick neutral (possibly forward).
- Fly level, using coordinated controls from now on
- Monitor the ASI
- Trend
- Passing the minimum safe speed
Rotation & Initial Climb
- Most gliders will rotate into the climb themselves (due to the pull of the cable). Hold the stick in a neutral position, while allowing the glider to climb.
- If necessary, ease / allow the stick back, ensuring that the transition from level flight at take off to the full climb is controlled, progressive, and lasts at least five seconds..
- Others (e.g. the Ka-8) may need to be prevented from rotating too soon – hold the stick firmly to control the rate of rotation.

Rotating rapidly is to be avoided. It:
- requires excessive vertical lift
- increases the AoA
- increases the wing loading
- invites an accelerated stall
The Full Climb and Release
- Monitor the climb angle:
- Wing tips <= 45 degrees to horizon
- Monitor the position of the horizon against the cockpit edges
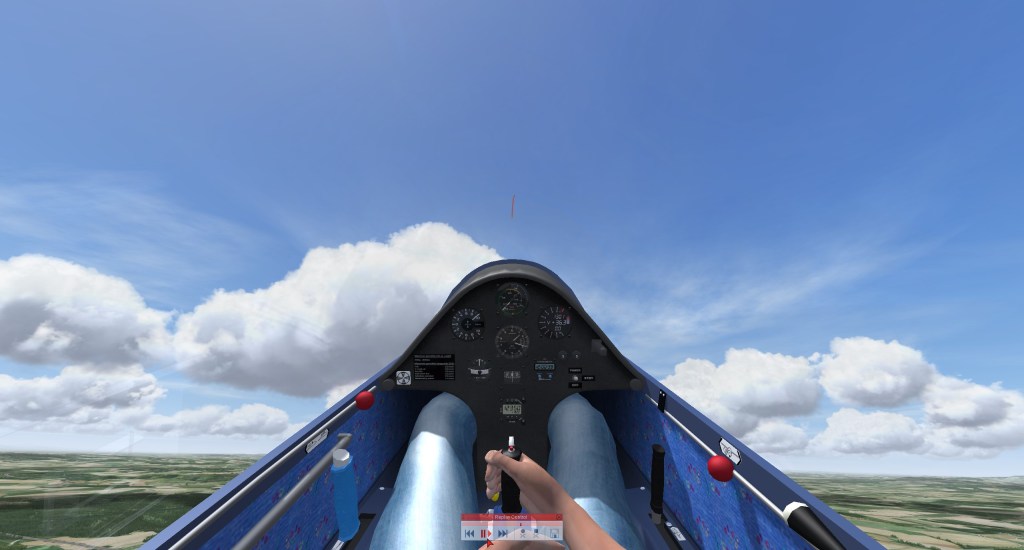
- Monitor ASI
- Too slow: risks a stall
- Too fast: risks damage to the glider, or weak link failure
- Fly straight:
- Towards a cloud
- By reference to a ground feature
- String straight, using coordinated controls
- Stick position:
- Initially neutral, perhaps some back pressure in the full climb (this is glider dependent)
- Pulling back, aka Pole-bending:
- Will not slow a modern winch down
- Will increase the AoA, without improving the climb rate
- Will invite an accelerated stall, especially at the top of the climb (where a high AoA can be masked – in level flight, with ‘adequate speed’ and no G force apparent)
- Release
- Towards the top of the launch, the climb angle will decrease.
- Ease the back pressure; allow the glider to return to the normal attitude and back-release.
- Configure for flight
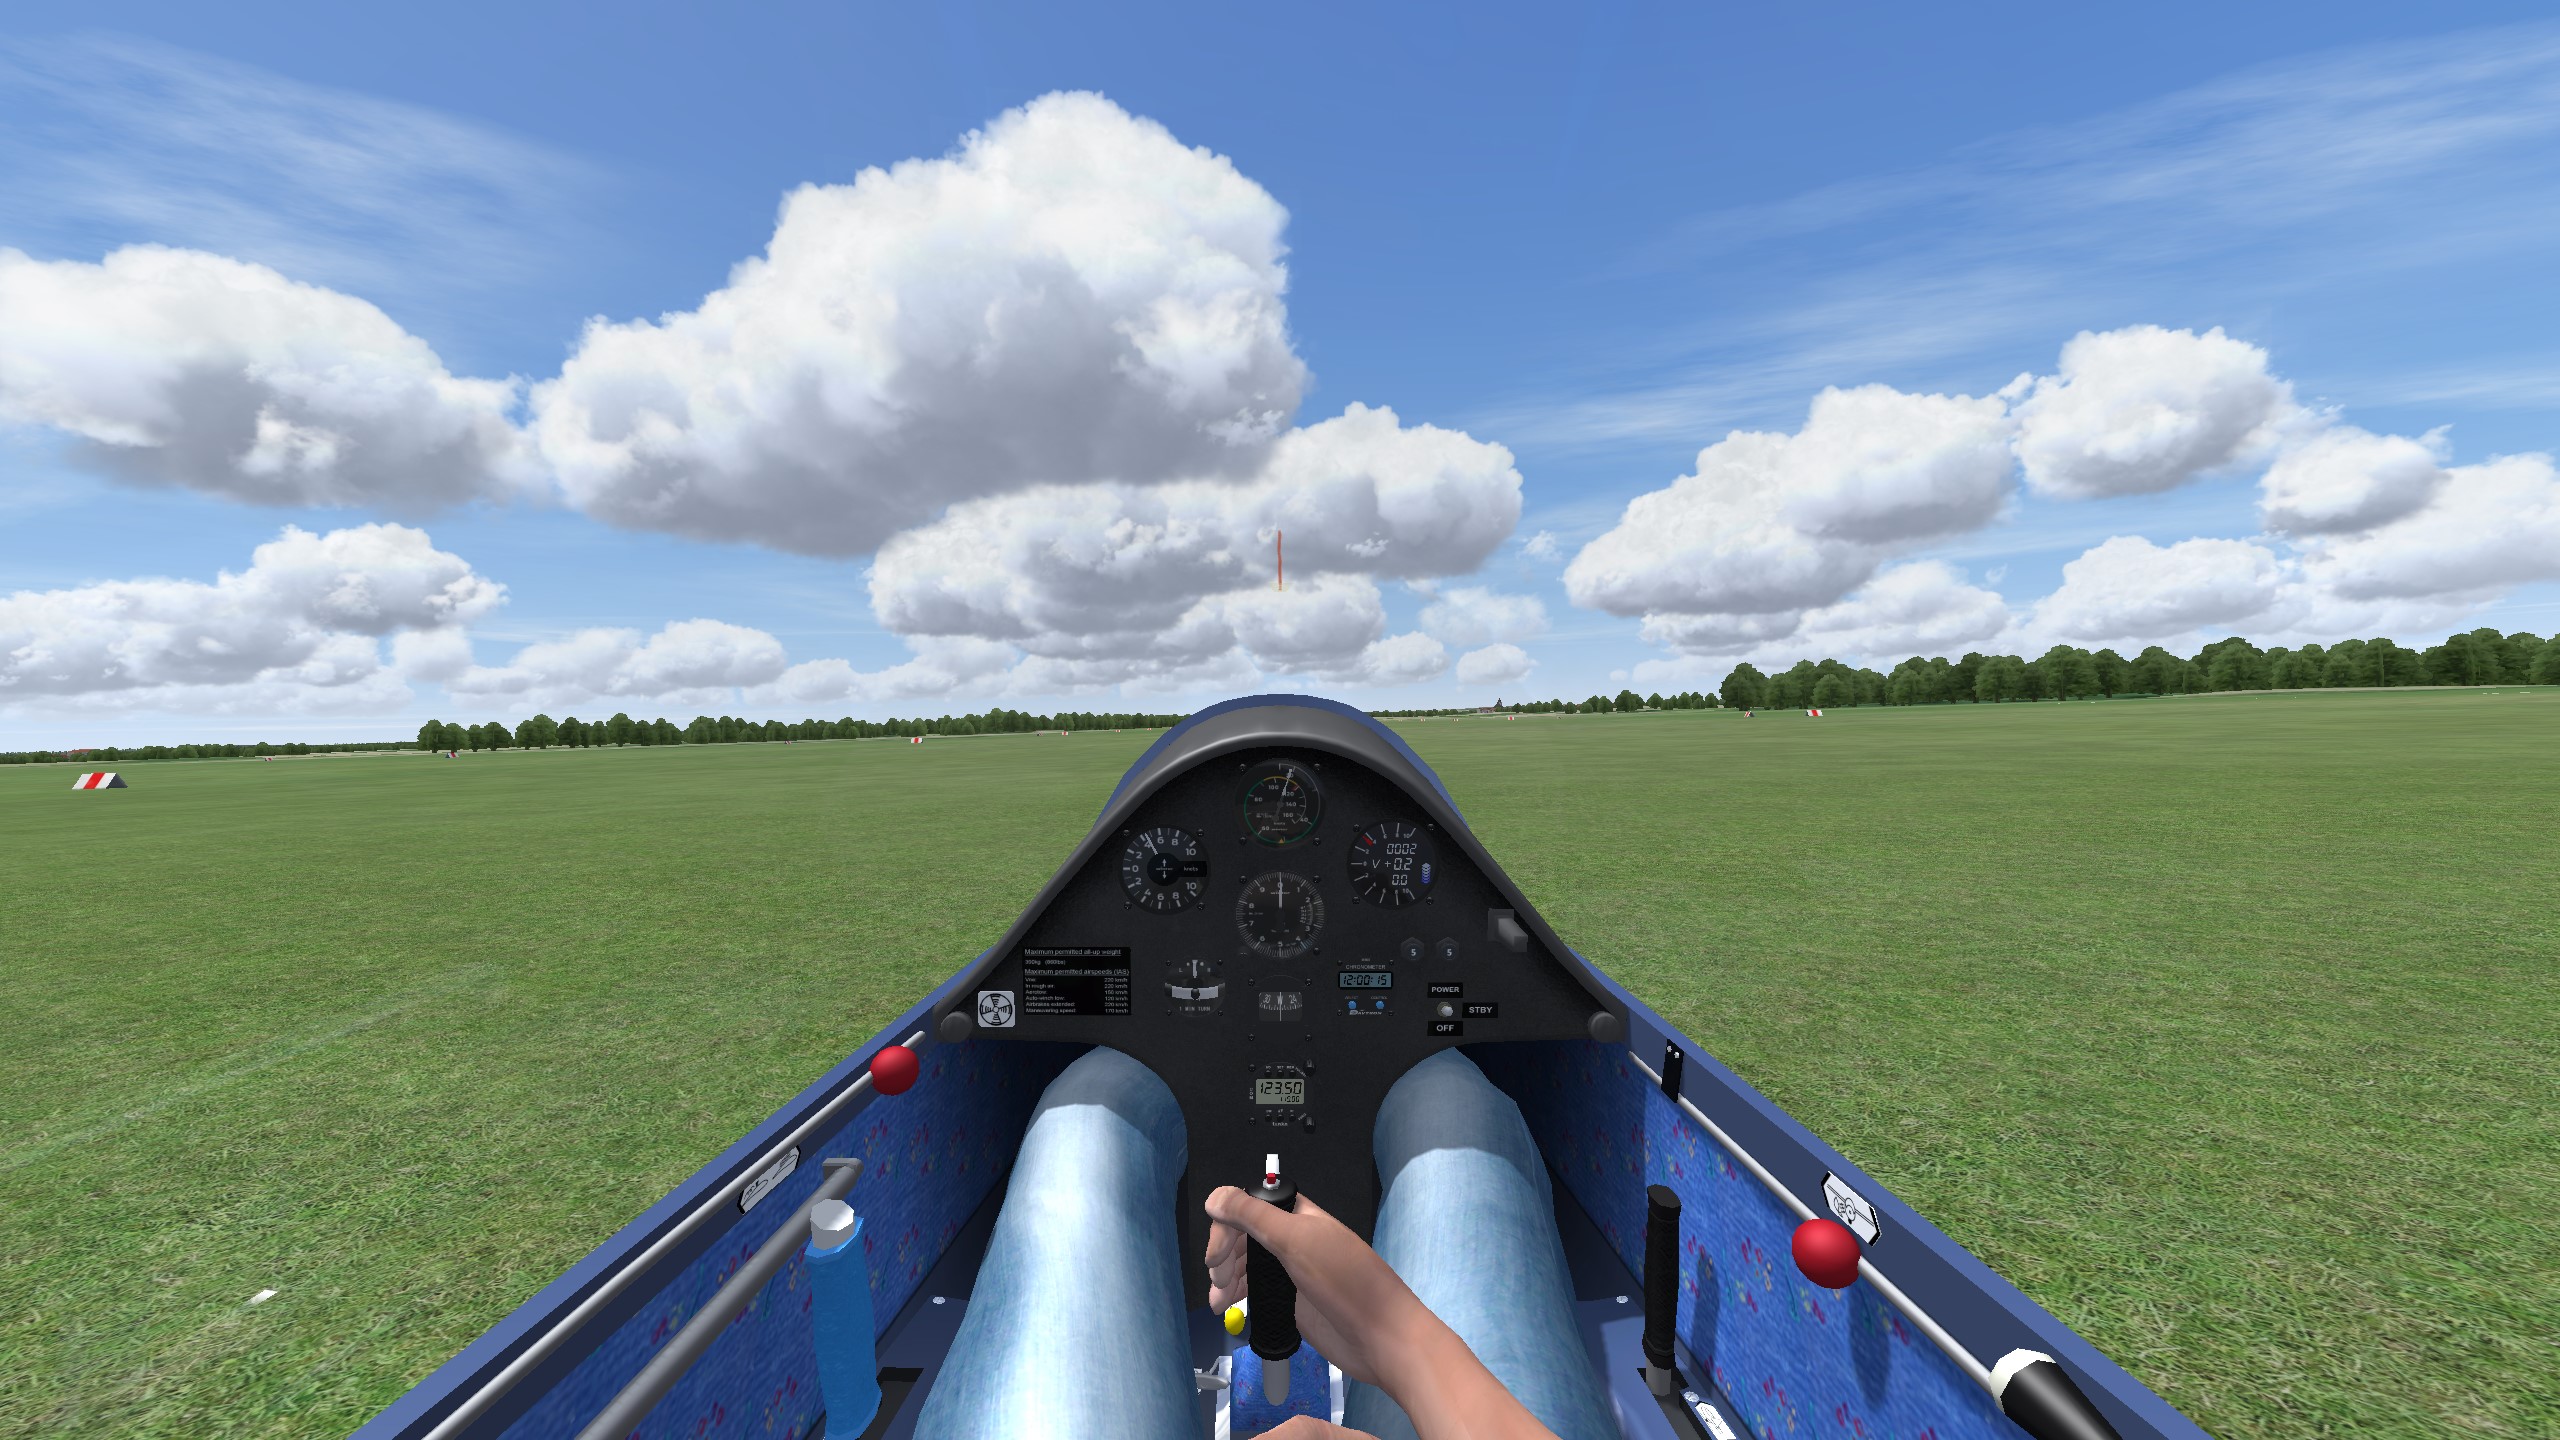
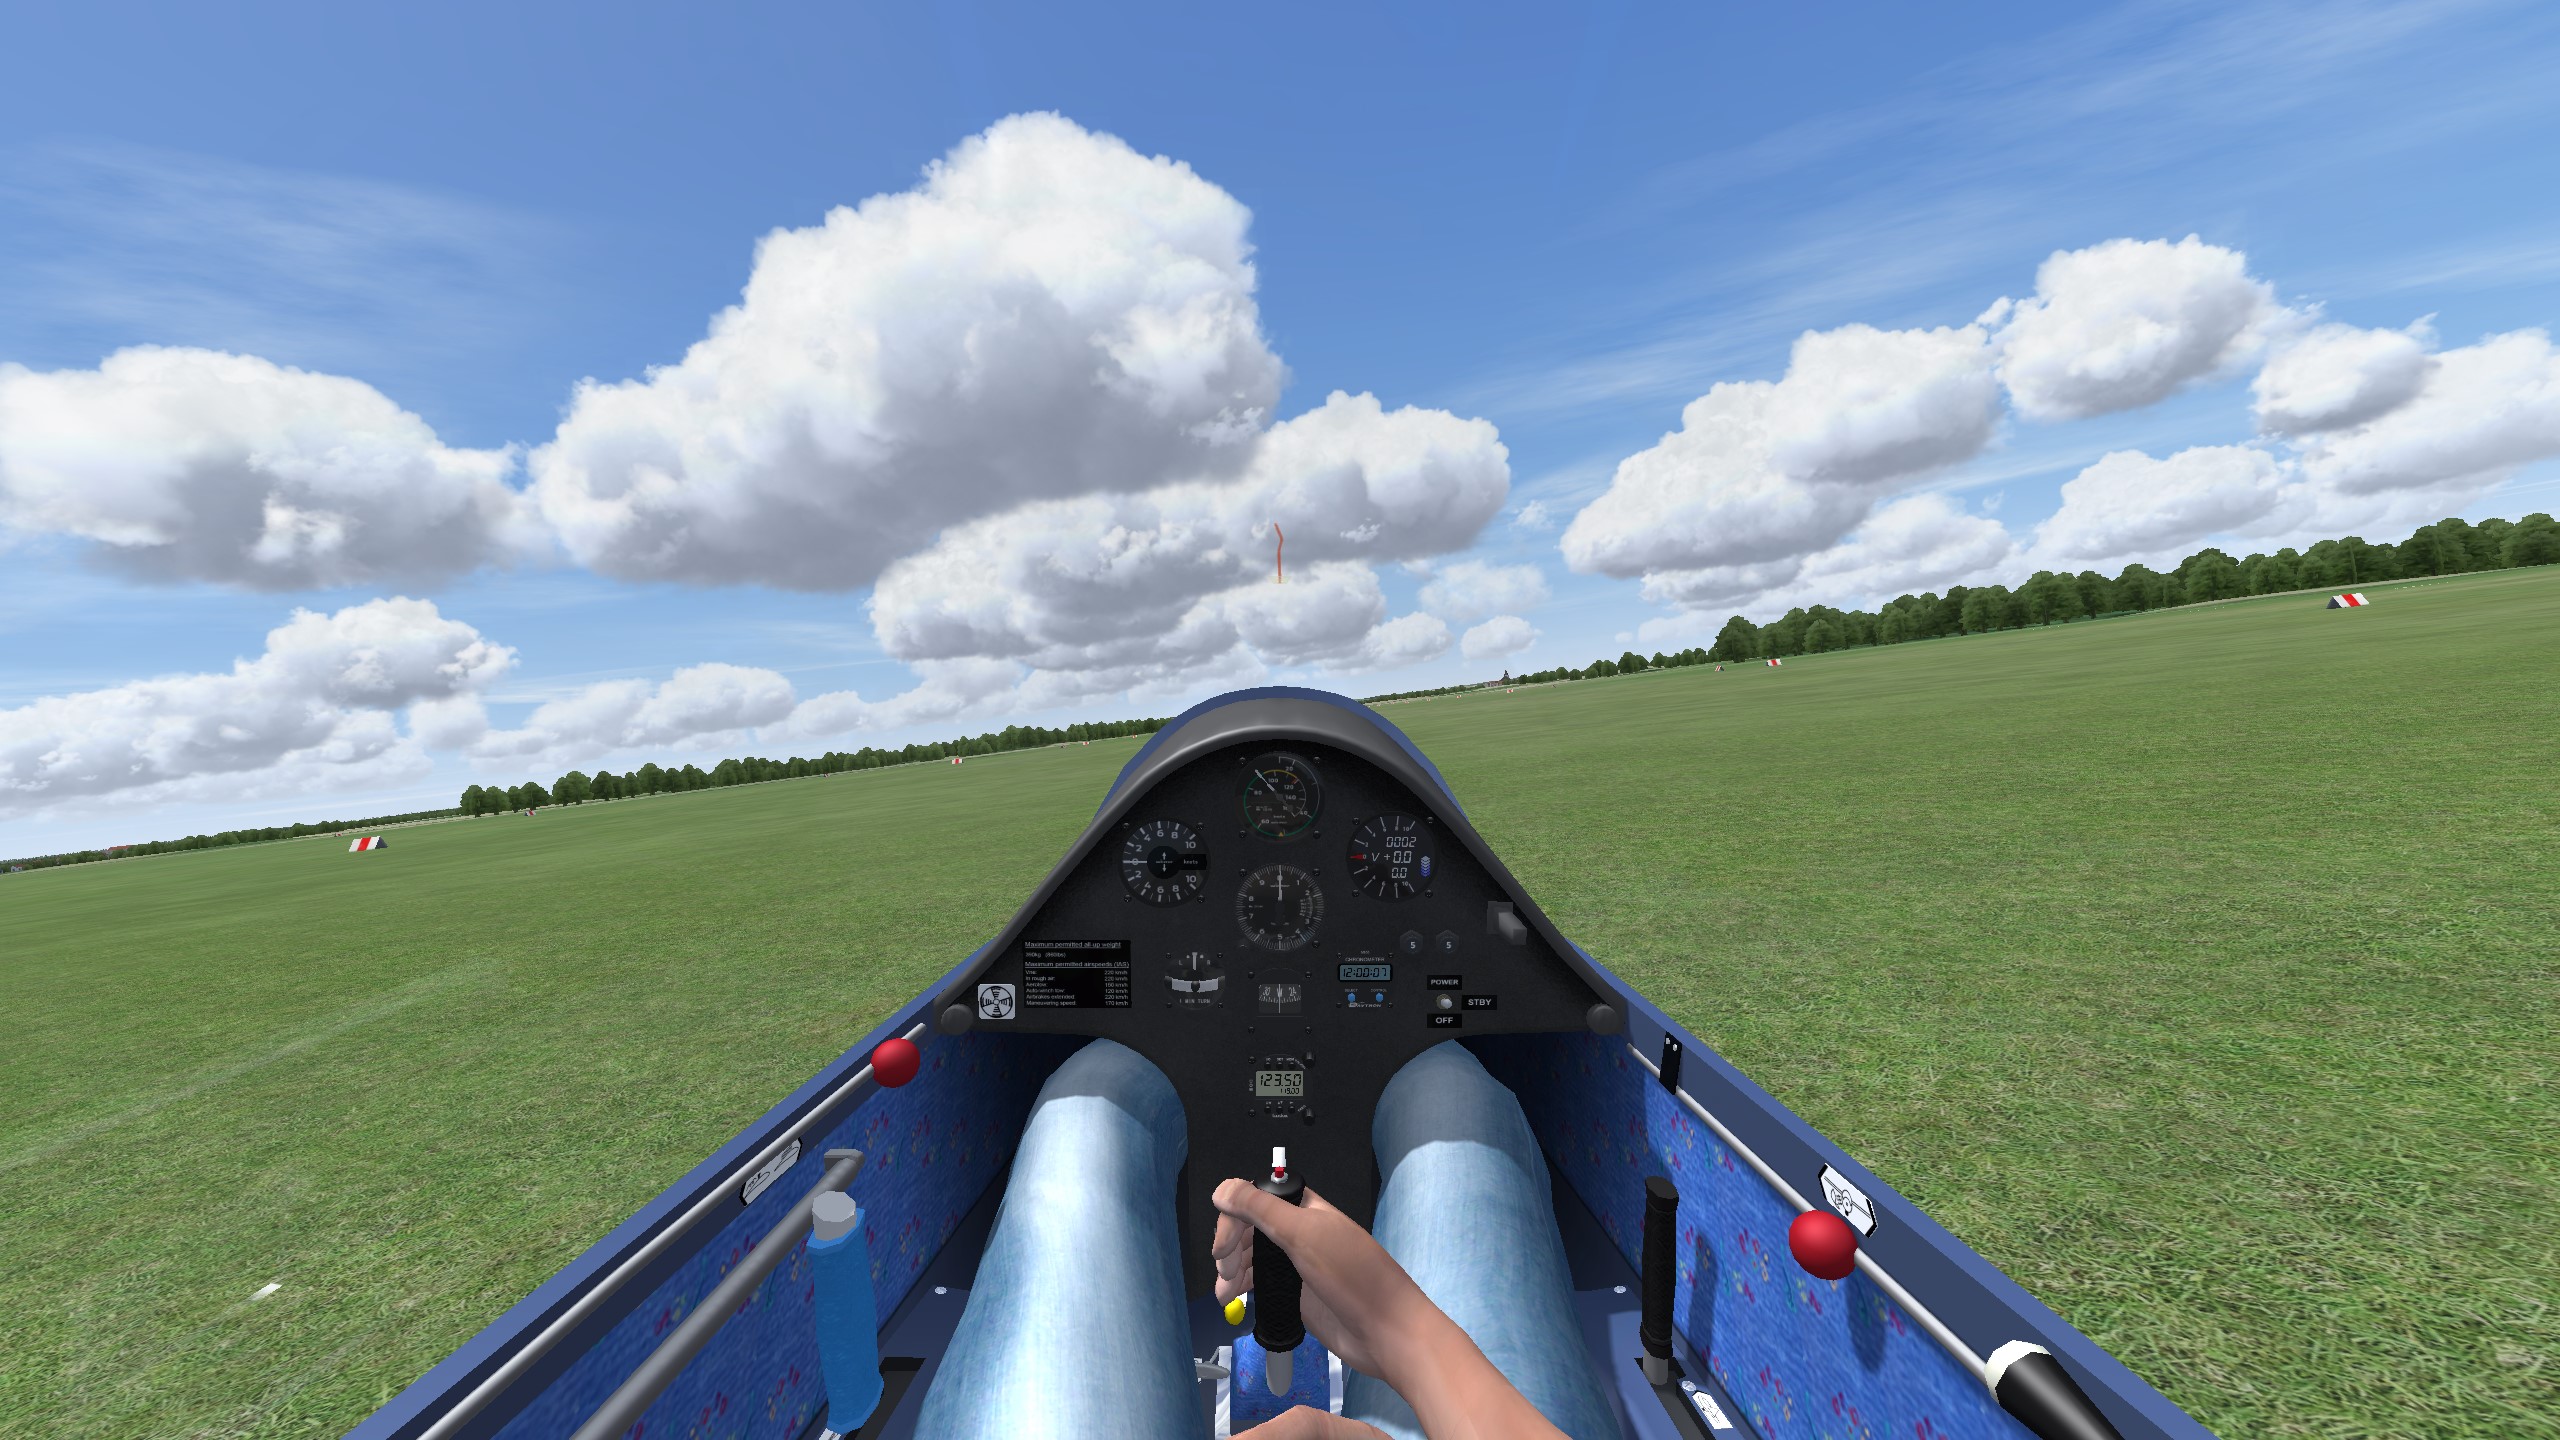
Loads during the launch
- G forces are not felt through the seat
- They will be increased, raising the wing loading
- They are carried by the cable and will not be felt by the pilot
- Stall speed increases
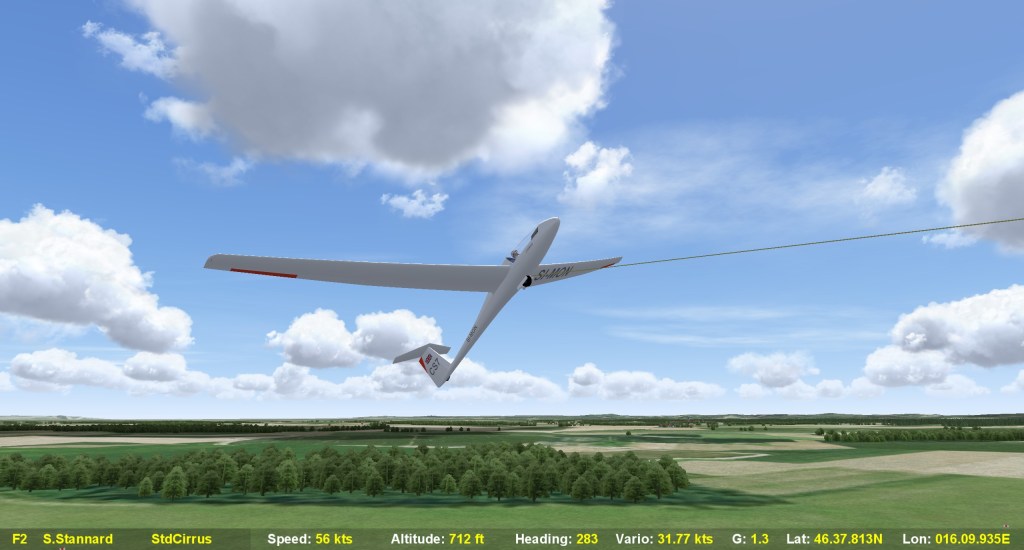
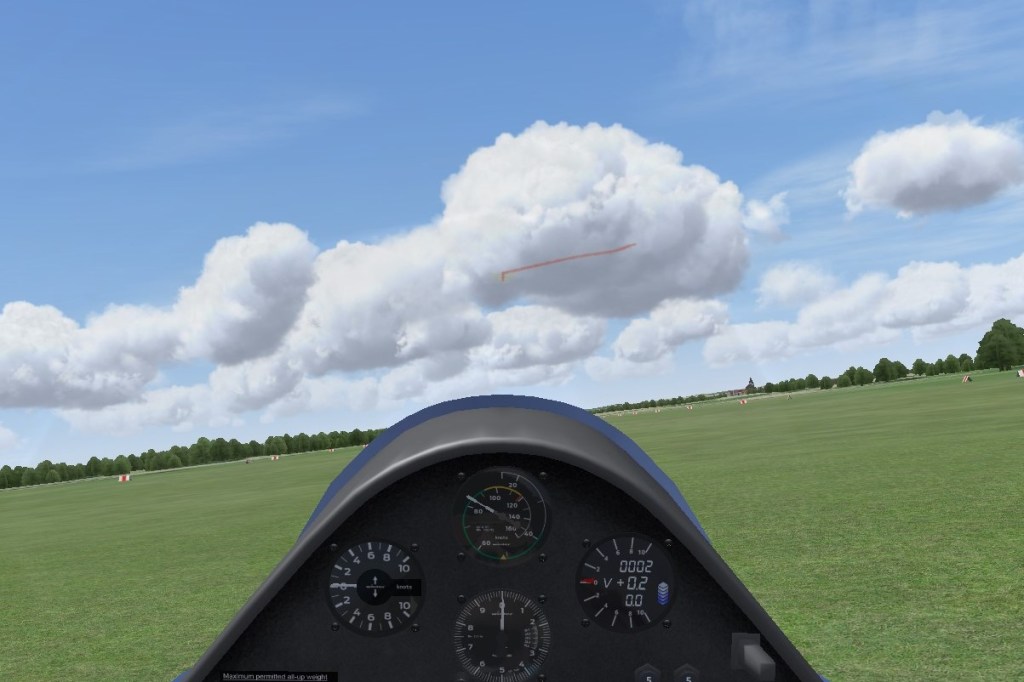
Note that in this image, the wings appear to be loaded – confirmed by the G reading of 1.3.
- G loads during the launch can exceed this significantly.
- The minimum safe launch speed is 1.5 times the 1G stall speed
Signals
Too Fast
In the lower half of the launch, approaching Max Winch Speed
- Risk of damage is low
- Risks inherent in abandoning the launch may be high
- Check the climb angle. Climb more steeply if appropriate.
- If the climb angle is correct, signal ‘too fast’:
- Yaw once both ways, clearly
In the lower half of the launch, significantly exceeding Max Winch Speed:
- Maintain the normal climb angle
- Abandon the launch at a safe height
- Release the cable under tension, and pause slightly before lowering the nose (the glider has excess speed and it is desirable to avoid collision with the cable and parachute assembly)
In the upper half of the launch, approaching Max Winch Speed:
- Risk of damage to the glider is higher
- Ease the back pressure on the stick (to reduce loads)
- Signal ‘too fast’
In the upper half of the launch, significantly exceeding Max Winch Speed:
- Abandon the launch
- Release the cable under tension, and pause slightly before lowering the nose (the glider has excess speed and it is desirable to avoid collision with the cable and parachute assembly)
Too Slow
- Ease the back pressure on the stick, to decrease the climb angle, and to maintain a safe speed
- This is the signal for the winch driver to increase speed
- If speed increases as required, re-enter the climb, monitoring ASI
- If speed does not increase sufficiently, treat it as a launch failure:
- reacting quickly gives you more time to land ahead
Crosswinds
Pre-launch
- How do we know?
- Prevent the swing:
- downwind rudder
- wing runner on downwind wing
In the climb
When established in the climb, lay-off:
- Into-wind wing down
- Coordinated flight
- String straight
Judgement:
- Ground reference and experience
- Position of the horizon, or wing tip, compared to normal

Know your winch
Power profile
- Modern winches are very powerful
- An older, standby winch may not be
- Some winch drivers apply a lot of acceleration, and keep it on!
- Unusual topography may require unusual power application
Cable characteristics
- Piano wire or cables are heavy, and repair joints are noisy
- Dynema is light, and quiet
How can a winch fail?
- All cables can snap
- Weak links will break
- Propane fuelled winches can ice-up in cold conditions, allowing a launch with rapid deceleration
- Winch drivers need to learn their art!
Know your glider
Limiting speeds
Refer to the placard
What will a wing drop look like?
Visualise the horizon pre-launch, with the wing on the ground.
Note: the emphasis is on keeping the wings level, and to release if this isn’t possible.
Stick position
Find out if it needs stick forward, or neutral on the ground run, and how does it climb?
Stick loads
What are the characteristics of this glider?
Recap
- What speed should we fly at during the launch?
- How hard do we pull back on the stick?
- When is it safe to rotate, and how do we do it?
- How do we signal ‘too fast’ and ‘too slow’?
- When would you not fly ‘wings level’?
- What do you do if you cannot keep the wings level during the ground run?
TEM (Signals)
Threats
Student Pilot fails to signal when required.
Mitigation:
- Instructor monitor closely and take over early, rather than late.
Errors
A poorly conducted signal may result in the glider being redirected left or right.
Mitigation:
- Monitor closely to maintain the correct bank angle.
A poorly conducted signal may fail to get the message across.
Mitigation:
- Instructor monitor the conduct of the signal, and if inadequate take over and demonstrate.
TEM (Checks)
Threats
Errors or omissions in the checks may result in taking off with an inadequately prepared glider.
Mitigation:
- Instructor carefully monitor the conduct of the checks.
Helpers & spectators may interrupt the checks.
Mitigation:
- Encourage third parties not to interrupt. When they do, be very careful the check has been correctly completed. If necessary, start again.
Errors
As instructor, after hearing the student pilot’s checks many times, it can be hard to remain attentive to their conduct.
Mitigation:
- Instructors should take sufficient breaks to maintain concentration.
Failure to allow for changing conditions.
Mitigation:
- Stay alert for changes, even on ‘benign’ days.
TEM (Launch)
Threats
Wing drop during the ground run.
Mitigation:
- Monitor angle of bank very closely & and release immediately if wings cannot be held level.
Cable falling onto things or people, on or off the airfield.
Mitigation:
- Consider the set-up carefully to minimise risk.
- Lay-off.
Stall / Spin.
Mitigation:
- Monitor ASI and do not allow speed to drop below the safe minimum.
Errors
Underestimating the risk.
Mitigation:
- Take care and try to arrange a margin in the airfield set-up.
Failure to allow for changing conditions.
Mitigation:
- Stay alert for changes, even on ‘benign’ days.
TEM (Release)
Threats
Collision.
Mitigation:
- Maintain a thorough lookout.
Errors
Release under tension, causing cable issues at the winch.
Mitigation:
- Instructor brief and demonstrate the correct procedure carefully.
Flight Exercises
Teach from the top down. The ability to fly straight and detect small changes in angle of bank is a pre-requisite – likely to be indicated by making good progress with approach and landing.
Wings not level
- Siting in the glider, show the student the normal wings level take-off attitude.
- Show them what a wing drop looks like.
- Brief them to release if they are unable to keep the wings level.
Signals – Too Fast
- Brief the student in anticipation of the need arising.
- Demonstrate & Patter Too Fast.
- Allow the student to signal when required.
- Abandon the launch if speed remains too high.
Signals – Too Slow
- Brief the student to lower the nose if speed decreases too much. Only raise the nose again if speed has increased sufficiently.
Demonstrate a full launch
- Left hand on yellow knob.
- Look ahead on ‘all out’.
- Keep wings level on ground run with aileron.
- Use rudder to steer (uncoordinated controls on the ground).
- Balance glider on the mainwheel.
- Monitor ASI (frequently).
- As glider takes off, use coordinated controls
- Hold it in level attitude while speed builds.
- Monitor ASI (passing through speed for rotation, and increasing).
- Allow the glider to rotate into the climb (smoothly and steadily).
- Look at wing tips to monitor angle of climb and bank.
- Monitor ASI.
- Apply lay-off as needed in a cross-wind, string straight.
- (As the climb angle flattens) look ahead to see the horizon coming into view, to judge attitude.
- Cable release (after easing cable tension if necessary).
Student attempts
- Learning to winch launch will require multiple lessons.
- Although you may patter the entire launch initially, start their hands-on experience by allowing the student to handle the upper part of the launch.
- Top third, until competent, then earlier…
- ultimately from the top of the rotation.
- Take-off and rotation: Instructor, do not hesitate to take over if necessary – there is no time to prompt.

