The purpose of this lesson is to describe the ‘normal circuit’ (or ‘pattern’). These don’t exist, but the idealised version is taken as the norm from which all others vary. It also introduces the terminology and sequence of events common to every well planned circuit. Landings are taught a little later, although these demonstrations all have one. This topic is one any student should read up on. References below. Being based on a simulator, the goal here is to illustrate how circuits can vary, often greatly, according to the circumstances. The basic theory will be described, but for a fuller discussion please see elsewhere.
Learning Points
What’s a Circuit for?
As a result of your reading, you will understand that the circuit has one goal: to deliver you to the best position for the Final Turn. It has a lot in common with Goldilocks: not too high, nor too low, not too fast, nor too slow… At a busy airfield, the circuit also helps to deconflict traffic. Lookout remains essential, as gliders especially can arrive at the same spot from any direction at a similar height. Everyone is converging to make their Final Turn. One might argue that the Circuit has a secondary goal of setting you up psychologically to manage the most important part of the flight: The Landing. Working back from the landing, the circuit is made up of:
The Reference Point
This is the spot on the ground that you ‘aim for’ on the approach. You’d hit it if you didn’t round out. If possible, position it well into the landing area to allow for an undershoot. It shouldn’t be so far into the field that you don’t have room to float and complete the ground run. This is the point on the ground you refer to as you fly round the circuit.
Approach Path
The Approach Path takes you to the round-out prior to the Reference Point. It follows a straight, steady, well braked descent to the Reference Point, at a safe speed. Well braked means half to two-thirds airbrake, so that you can adjust either way. A safe speed takes into account stall speed with a decent margin, any up-slope on the ground run, the headwind and notably any possible wind gradient, not forgetting the type of glider you’re landing. Refer to the Pilots’ Handbook for the glider. A good rule of thumb is 50kts minimum in a modern glider, rising to 60kts, or more as the wind speed rises. Local factors lead some sites to recommend a minimum of 70kts even in calm conditions. The Approach Path steepens as you fly faster and as the headwind increases. In very high winds, gliders have landed ‘backwards’, i.e. travelling downwind while facing into wind, but it’s not normal! It does demonstrate that an approach path can be very steep in the right circumstances. A good approach path would never be shallow. More of this in the lessons on Landings.
Final Turn
The Final Turn is positioned to allow for a straight, well braked Approach Path. The Final Turn is made at your chosen approach speed, and should be well banked and well coordinated. It should be the best turn of your flight, and so you should plan to arrive at it relaxed. Every Final Turn should be completed no lower than 300′.
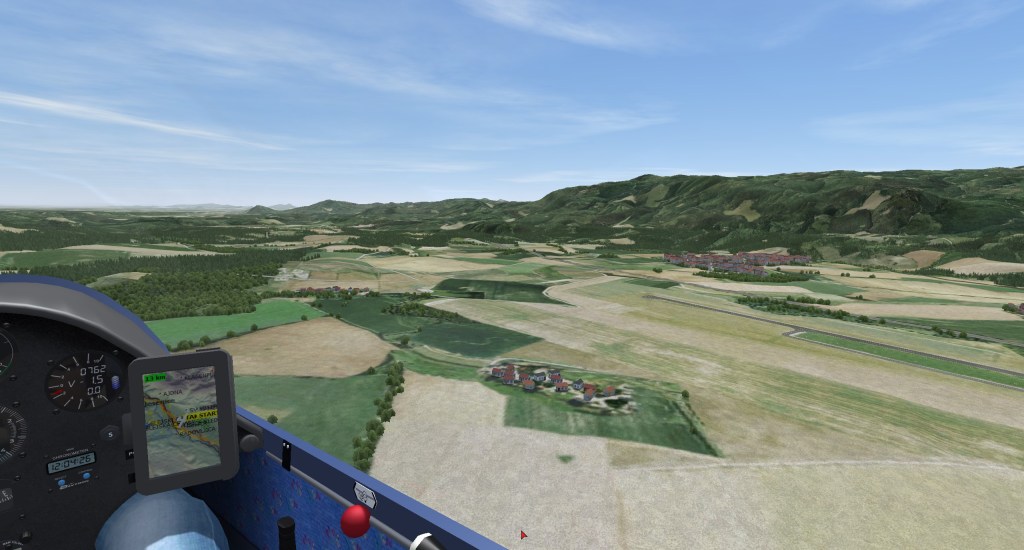
Base Leg
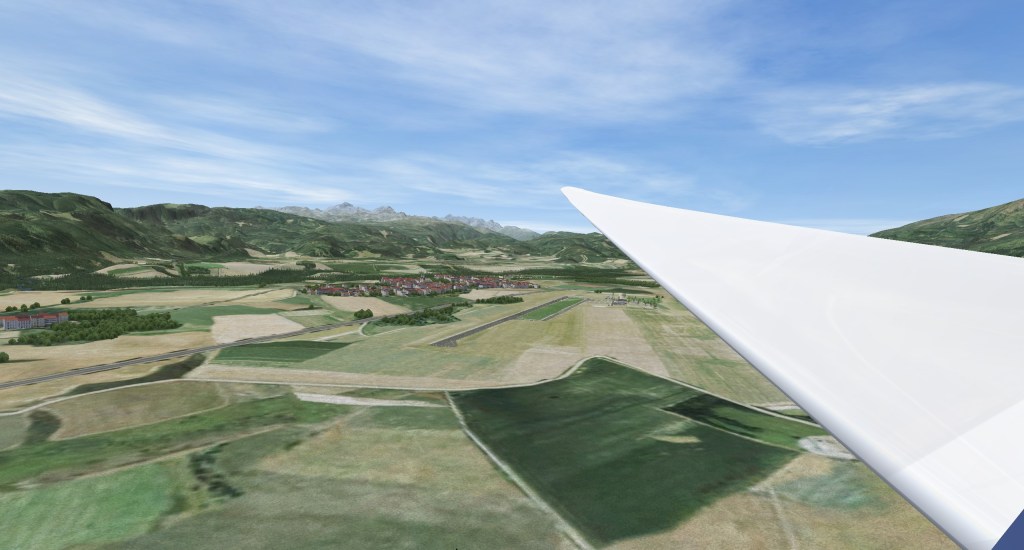
The Base Leg takes you to the Final Turn. It is usually flown at right angles to the Approach Path, but this need not be so. If you were low downwind, flying straight to the airfield and reached the right spot for the Final Turn, would you fly a longer route just to arrive at the “right angle”? As events unfold, you may change your chosen landing area, and hence change the base leg to suit the new final turn position. Base Leg should be flown at Approach Speed. You would normally be flying cross wind on this leg, so you can judge its strength from any drift. The picture shows a Base Leg pointing somewhat downwind, due to excess height.
Diagonal Leg
This leg takes you from the Downwind Leg to the Base Leg, cutting the corner at 45 degrees. Its purpose is to allow you to reach the Base Leg whilst keeping the landing area in sight, allowing you to make adjustments early rather than being taken by surprise. You turn onto the Diagonal soon after passing the Low Key area.
Low Key Area
‘Low Key’ is opposite the Landing Area, off to the side you have chosen to come downwind. It is a key decision point, where you plan the remainder of the circuit.
Downwind Leg
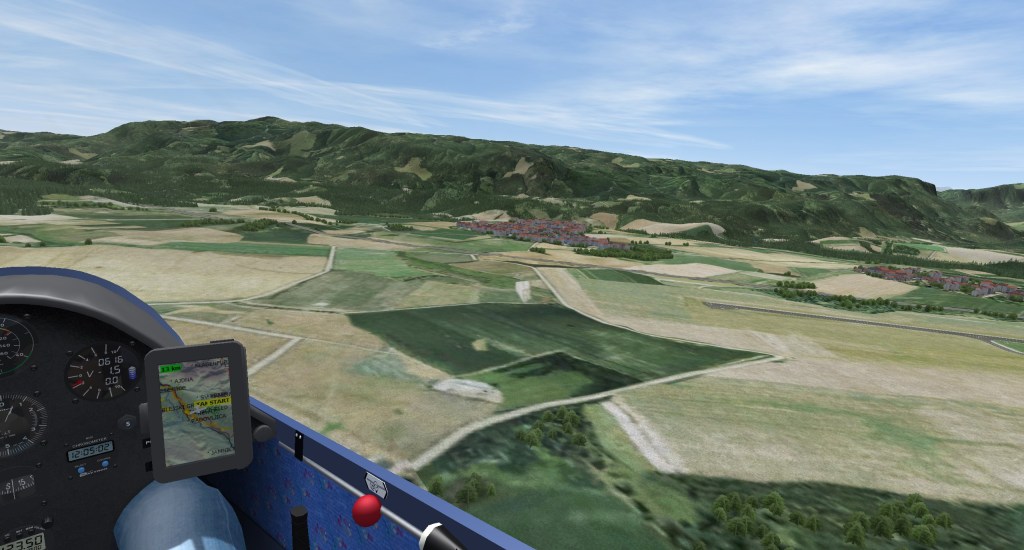
This leg is parallel to the intended approach path. The landing area is in view throughout. Speed would typically be best L/D. It is a good leg on which to manage height and position so that the diagonal and base legs are long enough to be useful, without being too high (or low). On a high wind day, the Downwind Leg can be completed very quickly, with little loss of height.
High Key Area
‘High Key’ is upwind of and to one side of the Landing Area, and is the area where you turn downwind to commence the circuit. On a breezy day, position it well upwind. For this to be ‘High Key’, by definition you have already decided to land, ideally before reaching the area. And hence you have already configured the glider for landing. This is a good time to double check the basics at least (Wheel down!).
Configure for Landing
When you make the decision to land, commit yourself to doing so. Too often people change their minds, and in the confusion forget some obvious things should they revert to landing shortly afterwards.
As part of the commitment to landing, you should “configure for landing”: prepare yourself and the glider for this phase of flight. Suggested items for inclusion would be:
Water should be dumped as soon as possible;
Undercarriage should be down and locked;
Flaps set appropriately, but may well need to change during the circuit, notably on Final Approach;
Security of loose items and straps;
Trim for the approach speed;
Aircraft speeds should be reviewed and approach speed planned;
Landing Area needs to be selected and checked for obstacles, and you were already…
Looking out… both inside and outside the circuit as well as in the intended landing area;
Radio calls as required locally, not forgetting to Aviate, Navigate, Communicate.
The best time to configure for landing is when you make the decision to land.
Scenario and Demonstration
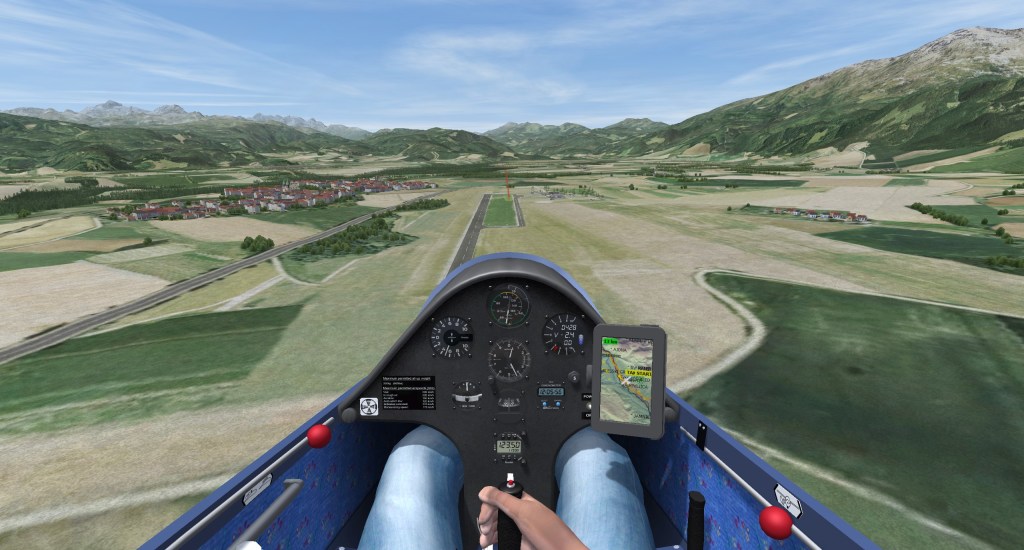
This demonstration aims to show a standard circuit, with a decision taken to land as the pilot drops below 1,000′ QFE some distance out and flying away from the field. It takes place in a wide valley, with a large airfield which has a clearly visible landing area and runway. The wind is ten knots from 320 degrees (i.e. straight down the runway from the mountainous end of the valley).
We join the flight as the pilot turns back to look at the airfield. As he flies downwind, the airfield is off to the right. The glider landing area is the bright green grass between the tarmac runway and taxi-way. It is clear. The pilot dithers a bit, then decides to fly to his High Key area upwind and this side of the airfield, maintaining best L/D or thereabouts. As he does so, his height above the field is dropping towards 800′. When in the High Key area, he commits to the landing, puts the wheel down, and turns onto the Downwind leg. The airfield can be seen to one side, and a clear view is possible when looking that way. Progress continues downwind at best L/D. He has plenty of height, so widens the circuit a bit by turning out a little. A further look at the landing area shows he is passing abeam, and is about to reach an area of sink in the lee of the small hills ahead, so decides to turn onto the Diagonal. Having plenty of height in hand, he decides to speed up as he enters this leg. Repeated checks of the landing area and then a turn onto Base Leg. The Diagonal was a little long, to use up some height and position the Final Turn a bit further back, making the Base Leg a little shorter. A well banked Final Turn with speed maintained lines the glider up for the Approach, still above 400′. A slight twitch shows you have to watch the speed – followed by a dip of the nose and initial opening of the airbrakes to manage the descent and landing. Landings will be discussed in another lesson.
The video is best viewed in YouTube in Full Screen mode, to easily see the on-screen messages during the demonstration. Use view, pause and rewind as needed to grasp the content and timing of the messages displayed, then focus on the action.
Performing the Exercise
When ready, select and fly towards your High Key area, turn Downwind, and onto the other legs where you think appropriate. Your goal is to make the Final Turn, coming out at least 300′ above the field, looking directly along the Approach Path from a suitable distance out.
Afterwards, ask yourself if your legs were as well positioned as you’d like. Were the heights and speeds acceptable? Did you have time to think and adjust all the way round, or were some parts a bit rushed? If you’d do it differently next time, have another go.
Further Reading and References
- Gliding From Passenger to Pilot, 2nd Edition: Page 106-108
- BGA Instructors’ Manual, 4th Edition: Section 3, Chapter 14
- BGA Instructors’ Reference Cards: Ex 12a
- Gliding: The British Gliding Association Student Pilot Manual, Section 4.10 and website.
Updates
The GlidingSchool.com lessons were developed for Condor2. They will be updated from time to time. Visit the Downloads page for news of updates, and to request the latest version.
Comments and Feedback
Your comments and feedback would be welcome. Visit the Contact page to send your thoughts.
Forums
Join us on the Forums provided by Condor Soaring and GliderPilot.net (the URAS forum).
