This lesson gets you back on the ground. It addresses the Round-out, Float, Touch-down and Ground Run. Crosswinds will be addressed in a later lesson.
Learning Points
Introduction
Landings require judgement and practise, especially in real life, but also in Condor. It is said that any landing you can walk away from is a good one, but your CFI might be a little more critical. The goal is to arrive safely, where you want, without making an impact.
Approach
The previous lessons dealt with the Approach, and those before discussed the Circuit. These determine where you will land. It is assumed that you are now able to arrive at tree-top height in the right attitude and at the right speed, facing a landing area clear of obstructions and with plenty of room ahead. I’m not sure what you did from there in the previous exercises without an instructor on board to get you home safely. But then real life doesn’t have an [Esc] key, so now we’d better deal with the hard stuff.
Round-out
The purpose of the round-out is to avoid hitting the ground. The Approach will almost always be in a nose down attitude, regardless of the amount of airbrake used. So now the task is to switch from aiming at the ground to one where you are essentially aiming to miss it. The attitude becomes one where we fly level with the ground as we try not to land. The process of raising the nose in the right place is ’rounding out’.
As you approach tree top height, switch your attention from the Reference Point to the area ahead. Ease back gently on the stick for a couple of seconds to bring the glider parallel to the ground, ideally no more than a foot (30cm) above it. Peripheral vision to either side is used here to judge your height above the surface.
Pulling back too hard could easily result in a stall and a hard impact with the ground. Easing back too late, or too slowly will also result in a hard impact. Easing back too soon will mean you have levelled out too high, but at least you can do something about it. If much too high, the preferred action would be to get a bit closer to the ground, by easing forward again very gently so that you don’t lose too much speed in level flight – then do another gentle round-out.
Float, or Hold Off
Having missed the ground and now in a level attitude, parallel to the ground, your goal is to lose as much energy as possible before touching down. This we do by not landing. Look ahead at the horizon, or the far end of the field if in hills. Monitor the horizon to keep the wings level, and ease back on the stick as you go. The nose should not rise very much, or sink. If it rises, hold the pressure before easing back some more. As you slow, you will be able to ease back more positively, until the stick is against the back stop. In the latter stages the nose will come up to an attitude matching the pre-launch attitude, without causing you to climb. This process is also known as ‘holding off’.
Touch-down
A fully held off landing will result in the tail wheel (or skid) touching the ground first, followed soon after by the main wheel. The glider has stalled just above the ground, at the lowest possible speed in this configuration, and you can be satisfied that almost all its energy has been spent. Congratulations.
Ground Run
Too soon to celebrate though, as the glider still has some energy and will continue to roll. The flight is not over until the glider stops. If on downward sloping ground this may take a while.
- Ease the stick all the way back if it isn’t already there.
- Keep the wings level (assuming you have not landed across a slope, in which case monitor the uphill wing tip so that it does not catch the ground). When raising a wing to keep the tip off the ground, watch that you don’t turn further downhill.
- Maintain directional control with the rudder, no longer coordinated with the ailerons.
- Open the airbrakes fully to drop below the stall speed quickly, being careful if they also operate the wheel brake. Once you have slowed sufficiently, use the airbrakes to control the distance you roll. Less is more in this case.
- Use the wheel brake to avoid hitting objects ahead. Excessive use will cause the glider to tip nose down. Glider brakes are often poor, so don’t rely on them. Much better to position the RP well, and to arrive at the correct speed.
Touch Down Too Soon
Be careful after touching down too soon (too fast, too level), as the glider will be above the stall speed. Any back pressure, or uneven ground, could cause you to relaunch or ‘balloon’.
Balloons
This is where the glider goes up again, either before or after touch-down. It is a sign the glider has an excess of energy. As result of a balloon, the glider will be further from the ground than you’d like, without enough energy to sustain its position there. Do not panic – you are still flying. You must regain a suitable attitude, to ensure you have the speed to remain flying. It may be best to stay level, or to ease the stick a little (very little) in order not to lose too much speed before getting closer to the ground. Leave the airbrakes where they are until touch-down. In real life, the instructor will be managing this situation very closely and will probably have some pertinent advice to offer, and will take control if required.
Scenario and Demonstration
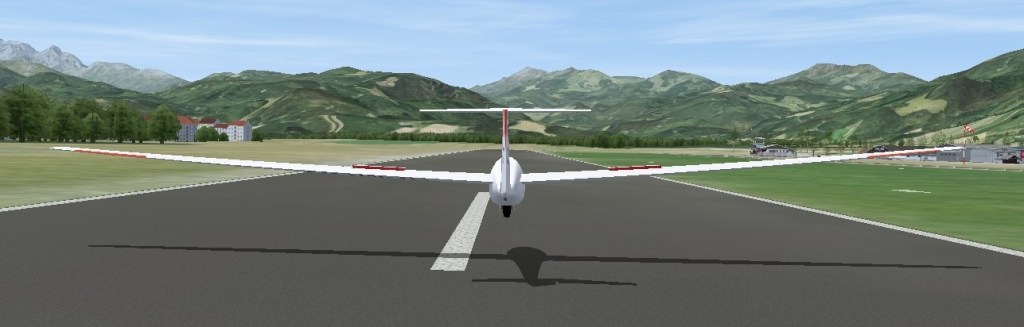
The demonstration starts as the glider is approaching 100′ above the ground, into a 10kt headwind, with the wheel down and two thirds airbrake open, at 50kt IAS. There is a little way to go before the round-out. Notice that we are still above the trees and (most) buildings. As we come level with the trees, we start to ease back on the stick, to follow a curve taking us to a level attitude a foot or so above the ground. We allow the speed to decay a little, and continue to ease the stick back. The demonstration shows the nose coming up in small steps as we ease, wait, ease and wait. Ideally the nose will come up slowly and smoothly. When recorded, there was a pre-stall buffet just as we touched down. On the ground, we use increasingly large control movements to keep the wings level and rolling straight.
The video is best viewed in YouTube in Full Screen mode, to easily see the on-screen messages during the demonstration. Use view, pause and rewind as needed to grasp the content and timing of the messages displayed, then focus on the action.
Performing the Exercise
See if you can reach the end of the runway.
Further Reading and References
- Gliding From Passenger to Pilot, 2nd Edition: Page 108-111
- BGA Instructors’ Manual, 4th Edition: Section 2, Chapter 13
- BGA Instructors’ Reference Cards: Ex 12d
- Gliding: The British Gliding Association Student Pilot Manual, Section 4.18 and website.
Updates
The GlidingSchool.com lessons were developed for Condor2. They will be updated from time to time. Visit the Downloads page for news of updates, and to request the latest version.
Comments and Feedback
Your comments and feedback would be welcome. Visit the Contact page to send your thoughts.
Forums
Join us on the Forums provided by Condor Soaring and GliderPilot.net (the URAS forum).
