The objective of this lesson is to bring together the skills you have now acquired to enable you to make smooth, coordinated moderate turns, of up to 45 degrees of bank. We will look at steeper turns later. Since glider pilots arguably spend most of their time going round in circles, doing so efficiently and safely is their most fundamental skill, worthy of practise from now onwards throughout your flying career.
Learning Points
We have practised coordinated rolls, during which the glider turned, so what’s different here?
Arguably, steeper turns are more prone to poor coordination, and the potential results of poor coordination include dropping a wing, or worse, entering an unintended spin or spiral dive. Neither of these is wise, other than at height. Hence, our goal is to always make our turns well coordinated.
Making a coordinated and sustained turn has three distinct stages: Going In, Staying In, Coming Out. And whilst doing so we need to maintain our lookout for safety, and speed for efficiency.
Going In
- The first stage of any turn is… Lookout. We must ensure the airspace we are about to enter is clear of other aircraft. Look first in the opposite direction of the intended turn, as far back as possible, then round to the other side, and overhead (especially if entering a thermal).
- Then we look over the nose, so that we can monitor the attitude and the string in order to judge our bank angle, rate of turn and when to leave the turn.
- Now apply aileron and rudder together, in a coordinated way. A steeper bank requires more aileron and hence more rudder. As we roll, we will need to apply some back pressure to the stick, with more being required as we increase the bank, to maintain the attitude.
- If we do nothing, the glider will continue to roll ever more steeply. As we approach the desired angle of bank, ease the stick back to the middle, and take some pressure off the rudder. Monitor the attitude, angle of bank, and the string, as you do so and respond accordingly.
Staying In
Now we are in the turn, we want to stay there, in balance. In still air the goal is constant bank, attitude and speed, with no slip or skid. The same is true in rough air – it’s just a bit harder to achieve.
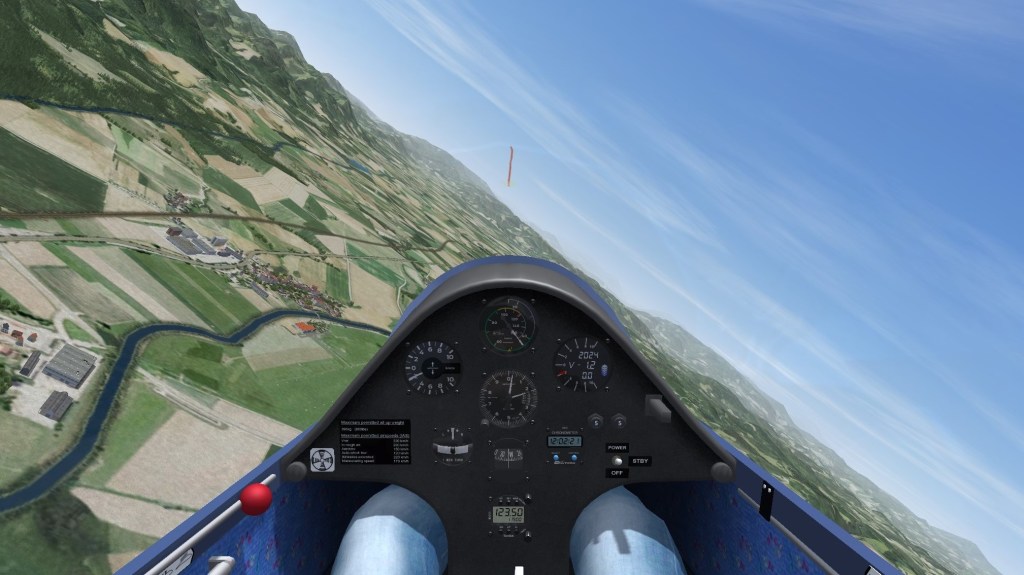
- Maintain bank by applying aileron as needed. You’ll probably need some ‘opposite aileron’, with slight out of turn pressure on the stick as if you wanted to roll out of the turn. This is visible in the picture above. This out of turn pressure is necessary because the outer wing is now travelling faster than the inner wing, and is creating more lift, which we need to counteract to prevent the bank angle increasing.
- With the wings banked, there is less vertical component to the lift, so we must keep the nose up by applying back pressure on the stick. Watch the nose track round the horizon, ensuring it is held at the same attitude as you go. This is easier over the flatlands!
- Adjust the trimmer to eliminate the stick load.
- Watch the string and apply correcting rudder as needed – gently! If the bank angle has altered, coordinate with ailerons. In fact all control movements should now be coordinated at all times.
- Whilst turning, keep a good lookout, especially into the space you are entering (and not down the wing).
Coming Out
- To exit the turn, first lookout to check it is clear ahead, and in front of and below the outer wing.
- Apply aileron and rudder together to roll out. To lower the outer wing, you will need to move the stick towards it, centring the stick as the wings come level.
- Ease any back pressure on the stick to maintain attitude. If you were well trimmed in the turn, you’ll need to apply forward pressure on the stick to prevent the nose rising as you come out of the turn.
- Retrim when at the desired attitude / speed.
Scenario and Demonstration
This demonstration is over a broad valley, with some hills to confuse the horizon a little. There’s a town ahead at the start – a useful reference to roll out to as you complete the 360 degree turn.
Alternative Video without animation
Performing the Exercise
In the exercise, first maintain the initial attitude, trimming as needed. Then lookout, and practise 360 degree turns. Don’t forget to practise in both directions.
You’ll want to practise this often!
Further Reading and References
- Gliding From Passenger to Pilot, 2nd Edition: Pages 88-91
- BGA Instructors’ Manual, 4th Edition: Section 2, Chapter 10
- BGA Instructors’ Reference Cards: Ex 8
- Gliding: The British Gliding Association Student Pilot Manual, Section 4.8 and website.
Updates
The GlidingSchool.com lessons were developed for Condor2. They will be updated from time to time. Visit the Downloads page for news of updates, and to request the latest version.
Comments and Feedback
Your comments and feedback would be welcome. Visit the Contact page to send your thoughts.
Forums
Join us on the Forums provided by Condor Soaring and GliderPilot.net (the URAS forum).
