A failure close to the top of the launch… Too high to land ahead, so we turn. Shall we go?
Learning Points
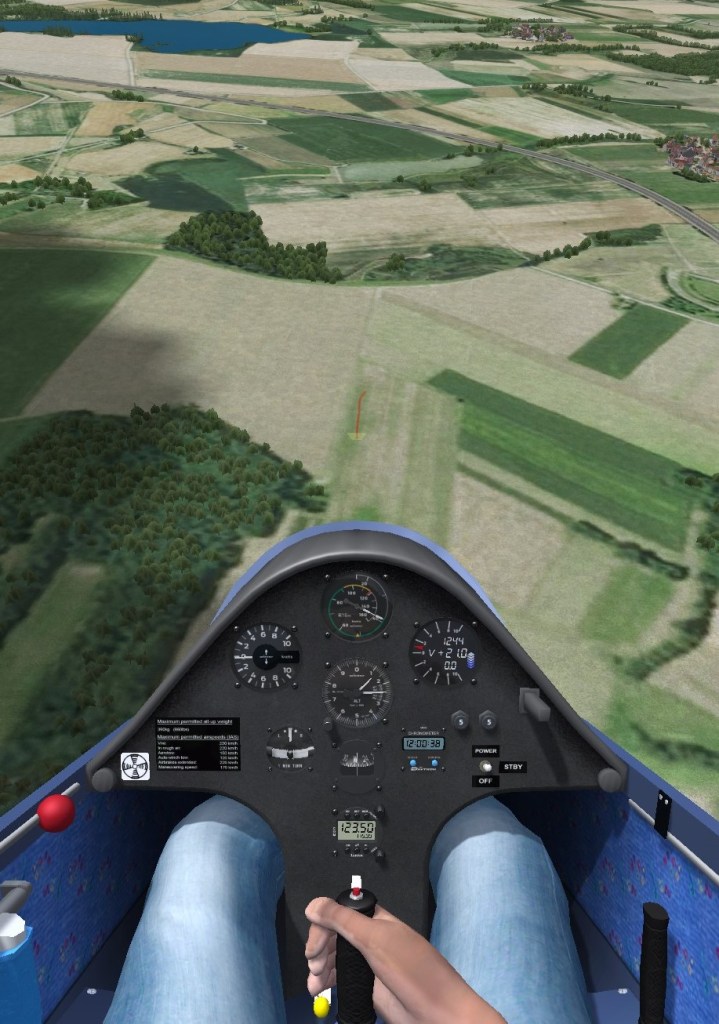
This lesson shows the glider has reached well over 1,200′, which may be considered a normal launch at some sites. When we reach the recovery speed we are still so high that we can’t even see the airfield beneath us. Do we count it as a successful launch, or a failed launch?
When we achieve the appropriate recovery attitude we must decide if we can land ahead. Clearly not, in this case. So, following the BGA guidelines:
Immediate Actions
The actions are the same as always. Assuming you have completed the previous lesson, let’s focus on the differences here:
Recover to the appropriate recovery attitude, while checking the airspeed.
The immediate action is to reach an appropriate recovery attitude. This we do.
Wait to regain the approach speed
We Waited, Waited, Waited.
Assess the situation
Once we push over after the launch failure, we can see we will not fit into the airfield ahead of us – we can’t even see it. We are higher than our usual circuit height, well above High Key, and we can see likely sources of lift all around.
Plan a safe approach and landing
We could turn to enter a large circuit, and assess the situation as we position into a more normal circuit pattern. We will turn first, assess our height loss and distance from the field when we have it in sight – then make a decision about whether to land.
Release the wire
Now you have a plan, release the wire, with two pulls.
Check the airspeed again
Execute the plan, and monitor airspeed.
Continue to monitor it
Airspeed is important after all.
Fly the approach and landing or a circuit variation to it
In this case the pilot assessed the situation and decided it was safe to fly away. Wheel up and go…
Scenario and Demonstration
This demonstration takes place with a ten knot headwind, at a relatively small airfield.
A Note About The Demonstration
Once hooked on, the pilot should keep their left hand on the release knob until they have released the cable. It isn’t possible to show this in Condor, so please use your imagination to visualise this.
The video is best viewed in YouTube in Full Screen mode, to easily see the on-screen messages during the demonstration. Use view, pause and rewind as needed to grasp the content and timing of the messages displayed, then focus on the action.
Performing the Exercise
The exercise is set up so that when you Try Lesson, the launch failure can occur at any point. You may therefore want to read all these winch launch failure lessons before trying them. The process is the same every time – you just have to get into the appropriate recovery attitude, wait, achieve the recovery speed, and make and execute a plan. Simples!
Condor shows the pilot pulling the cable release in the demonstrations, whereas in fact that was the point where the winch had failed (cable break). Your first action in any winch failure is to get into the appropriate recovery attitude, and only then deal with the cable release.
Condor is generous towards gliders in ground effect – they will float for miles. Seek instruction on whether you should use airbrakes in the eventuality of a very low level break. Condor requires it, but in the real world, airbrakes must be used with enormous caution at low level.
Further Reading and References
- Gliding From Passenger to Pilot, 2nd Edition: Page 102-105
- BGA Instructors’ Manual, 4th Edition: Section 4, Chapter 16, Page 7-9
- BGA Instructors’ Reference Cards: Ex 11c
- Gliding: The British Gliding Association Student Pilot Manual, Section 4.28 and website.
- BGA Safe Winch Launching
Updates
The GlidingSchool.com lessons were developed for Condor2. They will be updated from time to time. Visit the Downloads page for news of updates, and to request the latest version.
Comments and Feedback
Your comments and feedback would be welcome. Visit the Contact page to send your thoughts.
Forums
Join us on the Forums provided by Condor Soaring and GliderPilot.net (the URAS forum).
